Beginners Guide to Face Contouring: Face Contouring 101
If you already have a makeup routine in place, or are new to makeup all-together, taking the plunge into the land of contouring can seem daunting at first. But the reality is that facial contouring is a skill you can pick up in little to no time at all with a bit of practice! Here is a simple and easy-to-follow Face Contouring 101 to get you started.
Suggestion:
Before you get started on the steps below, prep your skin with a primer for even longer-lasting results. We’re loving theBalm’s TimeBalm Face Primer.
#Step 1.
Begin by applying a layer of foundation to your face to give it an even, balanced tone. I like TimeBalm Foundation by theBalm. It goes on like a powder, but it’s smooth and creamy, making it easy to blend. It’s also really great for building up coverage. You can start with a just a little and add more to areas where you need a different degree of coverage.
#Step 2.
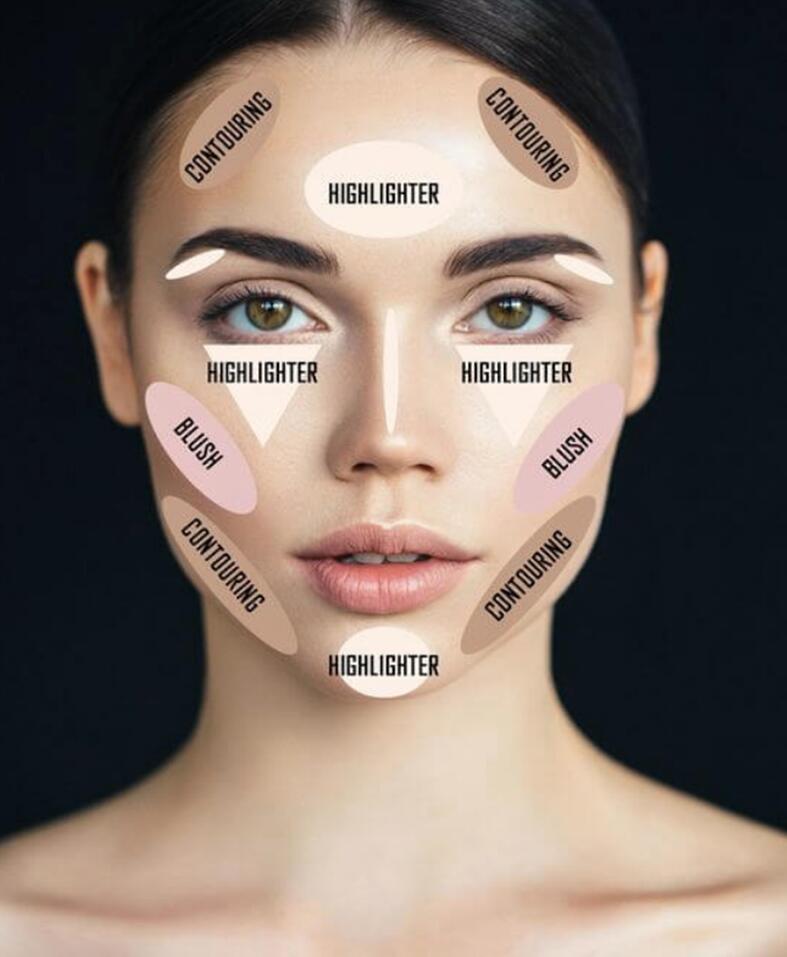
Then apply some bronzer under the cheekbones. theBalm’s Betty-Lou Manizer Bronzer/Shadow is wonderful for this. If you need more definition to help guide you, suck in your cheeks or make a fish face and then apply the bronzer under the cheekbone. Using the bronzer enables you to apply a deeper shade to areas you would want to add darkness to increase depth. To slenderize the nose, apply some bronzer down the middle of both sides. Let your lines get thick and dark, seemingly exaggerated. They get blended later.
#Step 3.
Put a blush in a brighter color, like theBalm’s DownBoy blush or theBalm’s INSTAIN Long-Wearing Powder Staining Blush in Toile to the apple of the cheek, or area just above the cheekbone. Use the blush to add brightness to make an area seem more convex, which works well in contrast with the bronzer.
#Step 4.
The final product you will apply is a highlighter, like theBalm Mary-Lou Manizer Highlighter, Shadow & Shimmer (or in this hue called Cindy-Lou Manizer). Placing this highlighter onto the areas of your face that are most prominent, such as the brow bone and over the apple of the cheek will add more dimension to the face. Applying a small amount down the top of the nose slenderizes it.
#Step 5.
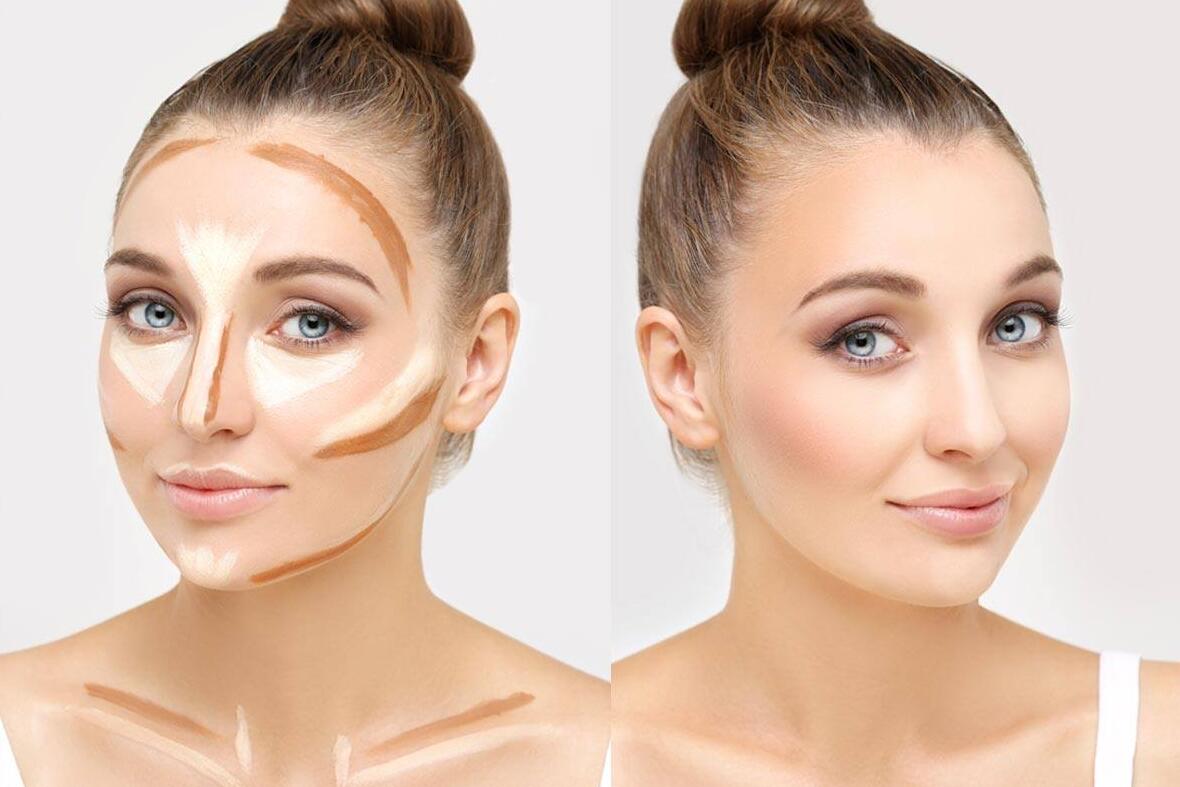
To complete your look, all you do is blend! Begin with the cream highlighter and smooth it out before it dries. I like to use my fingertips for this because the amount of highlighter is really small and covers an area that lends itself well to some finger blending. (You can also use a blending foundation brush for this job.) But then it’s time for the big guns! Use a big powder/blush brush like this one to blend the bronzer by rubbing it in a circular motion. Then, continue moving the brush upward toward the blush and continue blending it in until your colors mend seamlessly, and you’re done!
Ready to take on the world of face contouring! Get to it, mama!